I want to start off by explain the details and objective of this tutorial. The tutorial purpose is to teach you how to setup a simple led circuit and gain basic knowledge of http requests to establish restful commands.
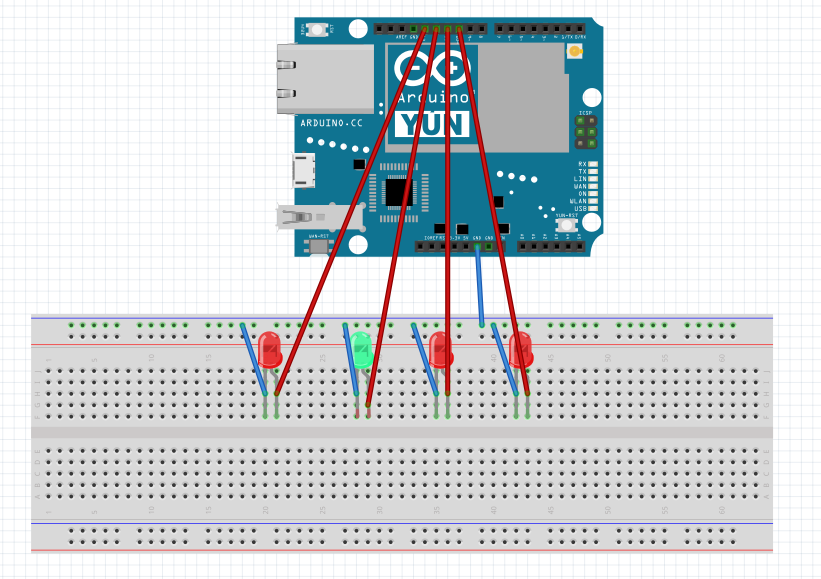
In this tutorial you are going to need the Arduino Yun, a circuit board, 4 led lights, some jumper wires and of course a power supply. You won’t need any resistors for this circuit since the Arduino boards are meant for low current leds.
Connect the wiring as shown below and make sure to either connect a micro usb or another power source to the arduino.

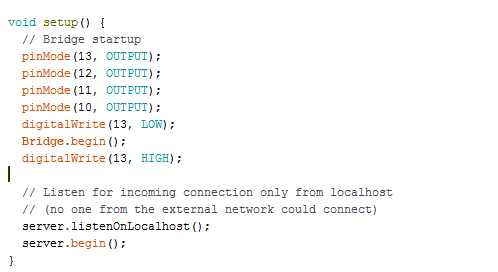
Next we will take a look at the script to compile to the Arduino Yun. The sketch can be found in Files ->examples -> bridge -> bridge. You will need to set pin 13 – 10 to outputs pin by using the pinMode method as shown below.

There are other ways of doing this but this is the easiest way. Compile the sketch and make sure either the micro usb is connected and you selected the right port in the Arduino Ide or your connected to the Arduino Yun’s wifi. We are now finished on the Arduino and ready to move into the Android side!
To move into part two of the tutorial press here.
